Open-Plan Living Room Lighting: How to Light Each Zone

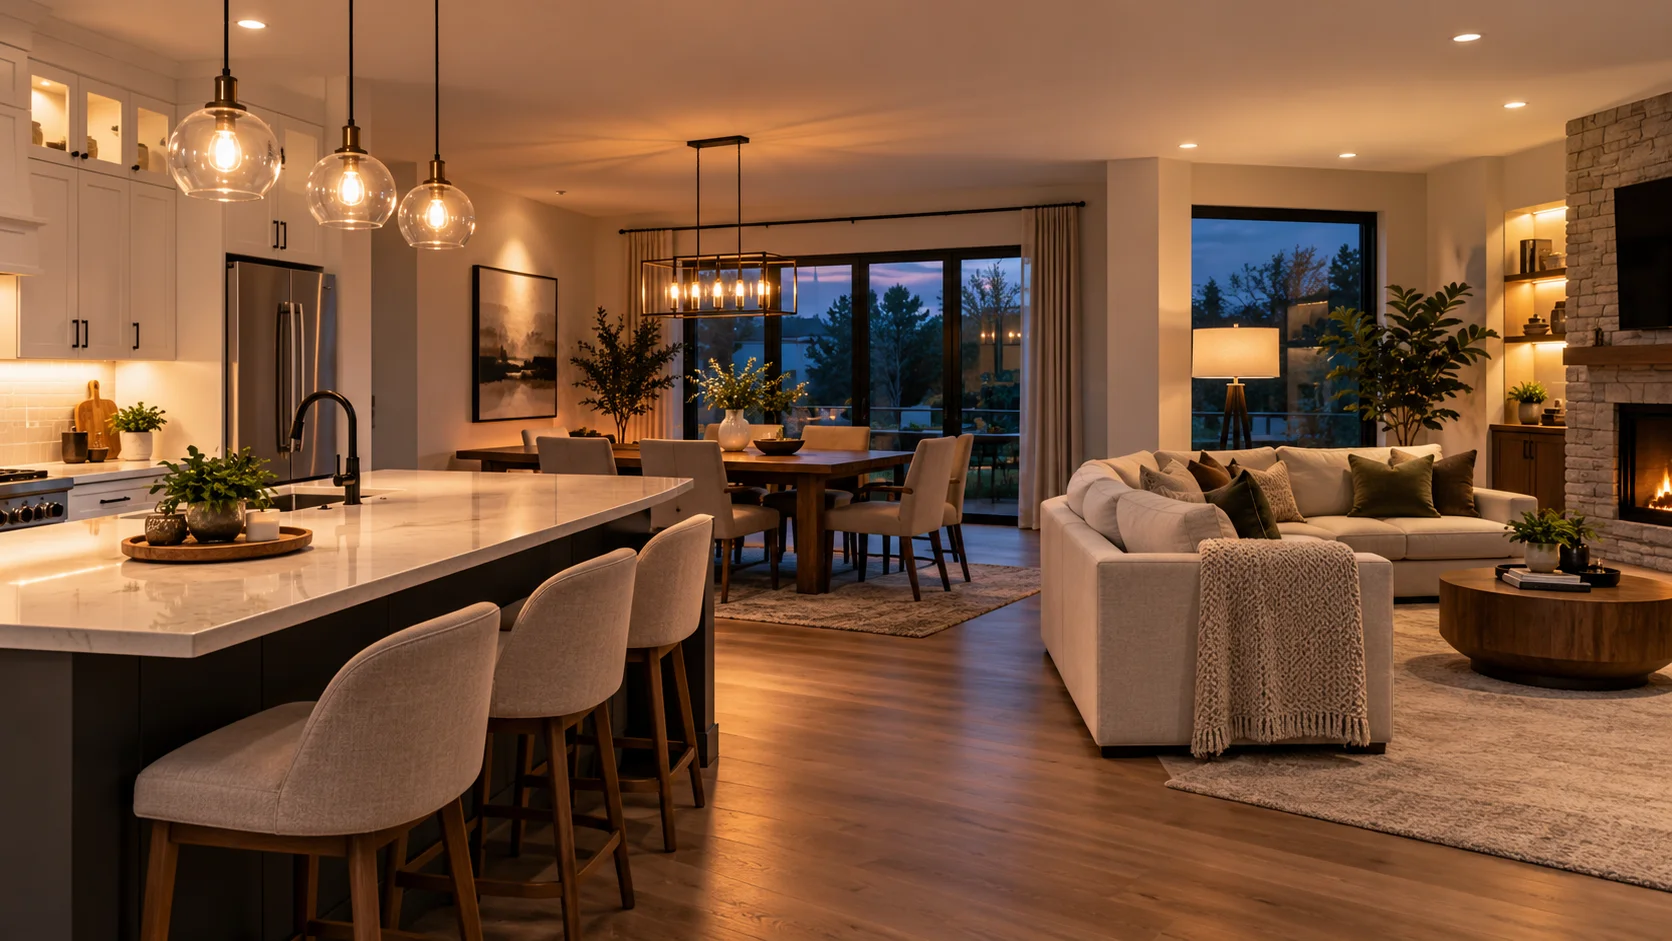
An open-plan room can have plenty of light and still feel wrong. The kitchen island is brightly illuminated, the dining table sits in shadow, and the sofa catches the full glare of ceiling pot lights. Turn everything off for a quieter evening, and suddenly nobody can see what they’re doing at the counter.
The problem isn’t necessarily the number of fixtures. It’s treating the kitchen, dining area and living room as one lighting zone when they serve three different purposes. A better plan gives each area appropriate brightness and independent control while keeping the entire space visually connected.
Start With Zones, Not Ceiling Fixtures
Before deciding how many pendants or recessed lights to install, mark out the activities that happen in each part of the room.
Start with the furniture layout: kitchen counters and island, dining table, sofa, television and any reading or working area. Then identify the routes people use to move between them.
A fixture centred on the ceiling may look symmetrical on a drawing but end up illuminating the walkway between the sofa and dining table rather than either activity.
Natural Resources Canada’s Home Lighting Design Guide recommends planning around people and their activities before considering architectural features or decorative lighting. That principle becomes especially useful when several rooms share one ceiling.
| Zone | Primary lighting | Supporting lighting | Main priority |
|---|---|---|---|
| Living | Soft ambient lighting from ceiling fixtures or lamps | Reading lamps, wall sconces, accent lighting | Comfort and flexibility |
| Dining | Pendant or chandelier above the table | Wall lighting, sideboard lamp or indirect light | Illuminating the table without glare |
| Kitchen | Recessed or surface-mounted general lighting | Under-cabinet lighting, island pendants | Visibility for food preparation |
The Living Zone
The living area usually benefits from the greatest flexibility.
A ceiling fixture or several recessed lights can provide general illumination, but portable lamps make evenings more comfortable. A floor lamp beside the sofa, a reading light near an armchair and a small accent lamp can serve different activities without requiring the entire room to be bright.
Pay particular attention to the television. Pot lights positioned between the screen and sofa may create reflections, especially on glossy displays.
The Dining Zone
A pendant or chandelier helps establish a dining area without physical walls. Its position should follow the table, not necessarily the centre of the overall room.
For a typical dining arrangement, a fixture hanging approximately 76–91 cm (30–36 inches) above the tabletop is a useful starting point. Adjust for the fixture’s size, beam spread and sightlines. Nobody should have to look around a large shade to speak with someone across the table.
Choose dimmable lighting so the table can be bright enough for everyday use and softer during dinner.
The Kitchen Zone
Kitchens need both general lighting and focused illumination where food is prepared.
Ceiling fixtures alone often leave shadows on counters because the person standing at the worktop blocks the light. Under-cabinet LED strips can illuminate these surfaces directly.
Island pendants may contribute useful task lighting, but decorative fixtures with heavily tinted shades or exposed bulbs aren’t necessarily effective work lights.
The kitchen should be able to operate at full brightness without forcing the living area into the same setting.
Make the Lighting Feel Connected Without Making It Identical
An open-concept space needs visual continuity, not identical fixtures or brightness levels.
The kitchen might be considerably brighter than the living room while someone prepares dinner. That difference is functional. What matters is how the lighting looks when the zones are used together.
Coordinate Colour Temperature
Colour temperature, or correlated colour temperature (CCT), describes whether white light appears warm or cool. It’s measured in Kelvin.
For adjoining residential spaces, 2700–3000K is generally a practical starting range. Around 2700K produces a warmer, more relaxed appearance, while 3000K looks slightly cleaner without becoming distinctly cool.
A straightforward approach is to use 3000K across the kitchen, dining and living zones, then adjust brightness independently.
Another option is 2700K in the living and dining areas with 3000K under-cabinet lighting where additional visual clarity is useful. The difference is relatively subtle, although it can still be noticeable where both sources illuminate the same surface.
Cooler task lighting may suit particular work areas, but avoid installing 4000K kitchen downlights beside 2700K living room lamps without considering how those colours will appear together.
Colour Rendering Index (CRI) is a separate measurement. Choosing CRI 90+ lighting is worthwhile where food, artwork, fabrics and finishes should look natural.
Balance Fixture Styles and Scale
Matching every fixture from one collection can make an open room feel repetitive. Three competing statement fixtures can be equally distracting.
Choose one strong focal point.
If the dining chandelier is large and sculptural, simpler island pendants may be more appropriate. If the kitchen island already features three prominent fixtures, the dining area might benefit from a restrained linear pendant.
You can create continuity through repeated finishes, similar proportions or related shapes without using identical designs.
Fixture scale matters as much as style. A large chandelier can overwhelm a compact condo dining area, while small pendants may disappear visually beneath a high ceiling.
Three Layouts That Work in Real Homes
The shape of an open-plan room determines where lighting zones overlap and which fixtures need to work together.
These examples show how to build a practical arrangement rather than simply filling the ceiling with lights.
A Narrow Condo With a Linear Floor Plan
Consider a condo where the kitchen runs along the entrance end, the dining table occupies the middle and the living area sits beside the windows.
The layout follows a simple sequence:
Kitchen → Dining → Living → Windows
Start with recessed or surface-mounted lighting for the kitchen, supported by under-cabinet strips. If there’s an island, position pendants over its usable surface rather than arranging them according to the overall ceiling width.
In the middle, place a pendant over the dining table. A dimmer allows this zone to provide useful light without dominating the living area.
Near the windows, combine a floor lamp and table lamp with whatever general lighting is available.
Because narrow condos often have limited wall space, avoid adding oversized fixtures to every zone. A single dining pendant can establish the middle of the room while smaller lamps define the seating area.
After sunset, the kitchen can remain softly illuminated while the living room lamps create a separate, more relaxed atmosphere.
An L-Shaped Open-Plan Space
An L-shaped room introduces a different problem: one area may be hidden around a corner and receive little light from fixtures elsewhere.
Instead of extending a uniform grid of pot lights across both sections, treat each arm of the L according to its function.
For example, the kitchen and dining area might share the longer section, while the sofa occupies the shorter one.
Give the kitchen focused task lighting, centre a pendant over the dining table and use an independently controlled floor lamp or wall-washing light in the living section.
The inside corner deserves particular attention. If it remains dark, a small uplighter or accent light can improve the visual transition between zones.
A Large Shared Family Room
Larger open-concept homes may contain multiple seating areas, a substantial island, a dining table and perhaps a desk or play area.
A single central chandelier won’t meet all those needs.
Divide the space according to furniture groups. Use general lighting for circulation, task lighting where activities take place and decorative fixtures where they help define a zone.
Wall washing is particularly useful in large rooms because it illuminates vertical surfaces rather than concentrating all the brightness on the floor.
The aim isn’t to eliminate every shadow. It’s to prevent one part of the room from feeling abandoned when the others are in use.
Calculate Brightness by Activity, Not Just Total Floor Area
Applying one brightness target to an entire open-plan room can produce misleading results.
A kitchen worktop needs substantially more useful illumination than a sofa during television viewing. Yet both may occupy the same uninterrupted space.
Lumens measure the amount of light emitted by a source. Lux measures the illumination reaching a surface, with one lux equal to one lumen per square metre. Fixture direction, mounting height, shades and surface finishes all influence the result.
For open-plan lighting, calculate or assess each activity area separately rather than multiplying the entire floor area by a single target.
Give Kitchen Tasks Their Own Light
Consider a 3-metre kitchen counter beneath overhead cabinets.
Even if the room contains several bright ceiling fixtures, someone standing at the counter may cast a shadow directly onto the food preparation area.
A continuous under-cabinet LED strip can solve that local problem more effectively than another ceiling downlight.
Position the strip to illuminate the useful counter area while shielding the LEDs from direct view. Check reflections on polished stone or glossy backsplash tiles before final installation.
The Canadian Centre for Occupational Health and Safety identifies task complexity, surface reflectance and individual visual needs as factors affecting required illumination. Its workplace lighting levels aren’t universal residential requirements, but the underlying principle applies: detailed work needs more usable light than casual circulation.
Keep the Seating Area Softer
Once you’ve separated the kitchen and dining zones, treat the seating area as a room with its own needs. A lighting layout for the living area helps you balance conversation, reading and screen use without letting the brighter kitchen dominate the space.
Dimmable ceiling lights, shaded floor lamps and indirect wall lighting can make the living area comfortable even while brighter task lights operate nearby.
For example, someone preparing dinner can keep the under-cabinet lighting fully on while another person watches television with the living room’s overhead lights dimmed.
That flexibility matters more than making every part of the open space equally bright.
Plan the Switching Before the Fixtures Are Installed
Lighting zones become genuinely useful when they can be controlled independently.
If the kitchen, dining and living fixtures all operate from one switch, the design loses much of its flexibility regardless of how carefully the fixtures were selected.
Where renovation work allows, plan separate controls for the major zones. Additional separation between kitchen general lighting and under-cabinet task lighting can be especially useful.
Scenes for Morning, Dinner and Evening
A practical control arrangement should support ordinary household routines without requiring everyone to manage a complicated smart-home app.
| Activity | Kitchen | Dining | Living |
|---|---|---|---|
| Morning breakfast | General and task lights bright as needed | Moderate | Off or low |
| Cooking dinner | Task lights bright | Soft or moderate | Low |
| Dinner with guests | Task lights low or off | Warm, comfortable table lighting | Soft ambient |
| Watching television | Minimal necessary lighting | Off or low | Dimmed indirect lighting |
| Cleaning | Bright general and task lighting | Bright | Bright |
These settings aren’t fixed rules. They’re examples of why independent switching is worth planning before electrical work begins.
Choose LED-compatible dimmers and confirm that the fixtures or bulbs are designed for dimming. Incompatible combinations can cause flickering, buzzing or poor adjustment at low brightness.
What to Do When You Only Have One Existing Circuit
An existing condo or older home may have several ceiling lights connected to one switch, making independent control difficult without electrical alterations.
Portable lighting offers a practical workaround.
Use floor and table lamps on separate outlets to create a living area that operates independently of the ceiling lights. Smart plugs can automate compatible plug-in lamps, while suitable smart bulbs can provide individual control within an existing fixture group.
Check the system’s compatibility before purchasing. Smart bulbs generally need continuous power for wireless control, and many shouldn’t be used with conventional wall dimmers.
Plug-in under-cabinet lights may offer another retrofit option when installed according to the manufacturer’s instructions.
For products connected to household power, Health Canada advises looking for recognized Canadian electrical certification marks, such as CSA, cUL or cETL.
None of these solutions requires altering fixed wiring. Any proposed circuit changes should be assessed under the electrical rules applicable in the province or territory.
Common Open-Plan Lighting Mistakes
A few decisions can undermine an otherwise well-designed lighting plan.
Installing a uniform grid of pot lights. Even spacing looks orderly on a ceiling plan, but it doesn’t necessarily illuminate counters, tables or seating properly. Position fixtures around activities and beam direction instead.
Letting the kitchen stay too bright all evening. Recessed lights can dominate an adjoining living area, particularly when everything shares one switch. Separate controls and local task lighting reduce that problem.
Centred pendants in the wrong place. A fixture should relate to the island or dining table beneath it. If furniture placement changes, the ceiling location may need reconsideration.
Mixing visibly different white light. A warm dining pendant alongside cool kitchen lighting can make connected surfaces look inconsistent. Compare bulbs and finishes under actual evening conditions.
Ignoring reflective surfaces. Glossy cabinets, polished countertops and television screens can create glare. Adjust fixture angles and use diffused light rather than relying entirely on higher brightness.
Build a Lighting Plan Before Renovation
If you’re renovating, prepare a simple lighting plan before the ceiling is opened or new drywall is installed.
It doesn’t need to be an architectural drawing, but it should clearly show:
- Furniture placement: Kitchen island, dining table, sofa, television and major circulation routes.
- Lighting zones: Which areas require independent illumination and controls.
- Fixture locations: Pendants, recessed lights, wall fixtures and under-cabinet lighting.
- Control locations: Switches, dimmers and how people will operate them from the room’s entrances.
- Electrical constraints: Existing circuits, outlets, ceiling construction and installation requirements.
Check the plan against real scenarios. Can someone prepare food while the family watches television? Can the dining light remain on without illuminating the entire kitchen? Will anyone walk into a dark passage when the main lights are dimmed?
In Ontario, the Electrical Safety Authority specifies that businesses hired to perform residential electrical work must be Licensed Electrical Contractors. Other provinces and territories have their own requirements, so confirm local rules before commissioning installation.
If the project involves replacing a few bulbs or adding portable lamps, begin with those reversible improvements. If you’re already renovating, invest the planning effort in fixture positions and controls while changes are easier to make.
An open-plan space works best when its lighting follows the way people actually live in it. The kitchen can remain bright and practical, the dining table can feel inviting, and the living room can settle into softer light—all without walls separating them. The fixtures create the layers, but the ability to use those layers independently is what makes the whole room work.